This blog post is part of a “Working with OAuth 2.0 APIs in Azure Data Factory” series, and you can find a list of the other posts here.
After registering an API App with the vendor (Xero in the example I’ll be using) and looking at their documentation, you should have a client ID, client secret, authorization URL and other information to start testing your API calls. Postman takes a bit of time to get used to, but once you do you’ll quickly realize how useful this tool is when you’re trying out new APIs. Let’s take a closer look at how you would set things up.
The setup
Postman gives you the ability to create a collection, and it is where you can configure the authentication protocol to use for all subsequent API requests. Based on the vendor’s documentation and the information from our app registration, I configured the authorization settings in the following manner:
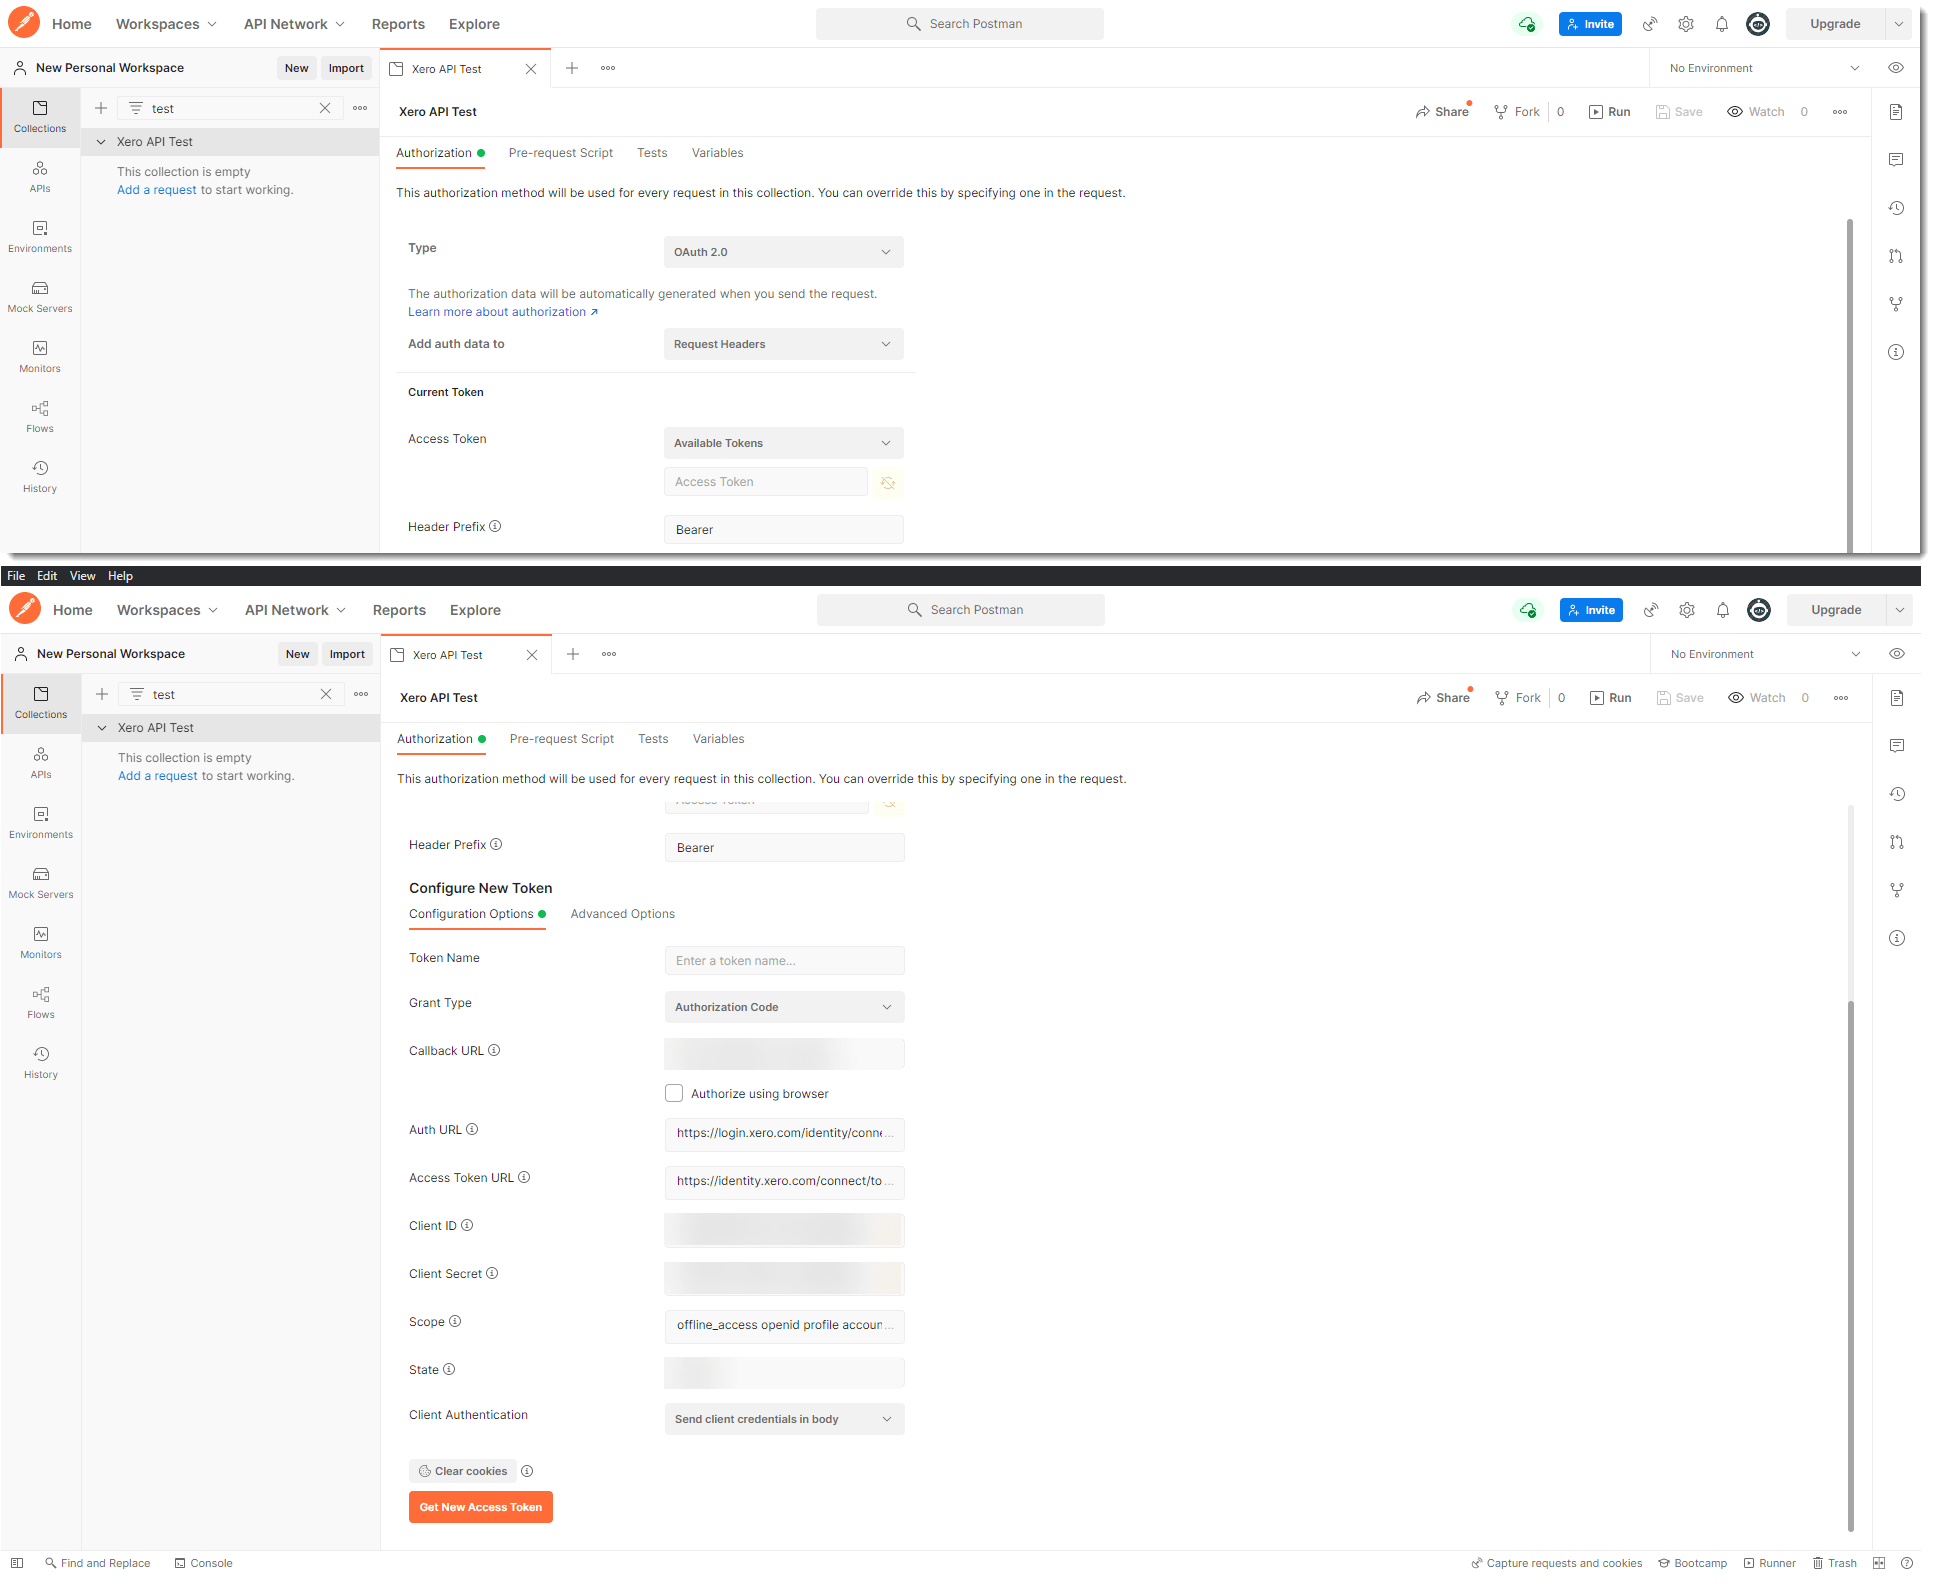
All of the information shown in the image above is important, and could vary depending on the vendor and how they’ve chosen to implement the OAuth 2.0 API. For example, the vendor in this case (Xero) requires that the client credentials be sent in the body and not the header. It’s these kinds of nuances that make it difficult to work with OAuth 2.0 APIs, but all the answers should be in the documentation and you’ll get to it with some reading and experimentation.
If the configuration info is correct, clicking on the “Get New Access Token” button should bring up a browser window with your vendor’s login screen. Provide your credentials and consent to the information you’ll be providing access to, and a window with some tokens should pop up. Success!!


You can now click on the “Use Token” button and Postman will save the tokens for use in API requests.
API Requests
One of the API requests you can make in Xero is the Connections request, to check which tenants your registered app has access to. This request also returns a tenant ID which is required in other API requests. By creating a new request in the Postman collection, it will inherit the authorization configuration from the collection by default and we simply have to add the URL and send it to get the info we want:

Now the real fun starts, and you can begin experimenting with different requests, parameters etc. which I will omit for the sake of brevity. Pro Tip: Look at variables in Postman and how to use them…it will save you a bunch of typing while testing different requests.
Refreshing tokens
At some point in your API journey, you will send a request and get an unexpected “Unauthorized” error, and if you’re lucky the response will also tell you that your token has expired. Now what!?
Well, it’s time to get a new token and we can do that without logging in via the user interface again, because we received a refresh token when we did that the first time. To get the refresh token in Postman, go to the “Manage Access Tokens” section of the collection, select the token (which will have a line through it to indicate that it has expired) and scroll down until you see it.

Back to the API documentation, it looks like we need to use the “token” endpoint with some other information to get a new token. This is where it gets tricky!!

According the the documentation (snippet above) we need to provide the client ID and secret (from our app registration) in a basic authentication header, and then some additional info (including the refresh token) in the body. Postman will automatically encode authorization header details with base64, but keep this little detail in mind as it will come in handy when we have to do this in Azure Data Factory. The Postman configuration will look like this, with the client ID used as Username and client secret used as the Password:

Postman takes the authorization information and automatically adds it to the header (in encoded format), which you can see below. We also add the grant_type and refresh_token (obtained from the expired token) to the body as instructed by the documentation, and we are now ready to send the request to get new tokens.

If all the information is correct, the response will contain a new access and refresh token which you can add to the collection’s configuration in Postman to use in subsequent requests.
It’s a mouthful and very laborious, but walking through the process in this fashion will help you understand the nuances of the API and how the token exchange and refresh process works…critically important elements you’d need to understand before attempting it in an ETL tool like Azure Data Factory.
As you work out the kinks of your API, pay special attention to the following:
- The small details in the authorization and refresh process will trip you up, and a tool like Postman makes it at least a little easier as you can see the entire request it generates as well as the response. Get this part working before you try to do it anywhere else. You’ll need the API documentation for that.
- Every API has different limits. Make sure you understand these limits as it may require you to send multiple API requests in order to get all the data you need.
In the next post we will move on to Azure Data Factory and start setting things up for API requests.