This blog post is part of a “Working with OAuth 2.0 APIs in Azure Data Factory” series, and you can find a list of the other posts here.
The first (and arguably most critical step) when dealing with REST APIs is authorization, and this is also where things usually get interesting. Most APIs allow a few different methods for authentication, but we’re going to focus our efforts on the code flow as it seems to be the most commonly used.
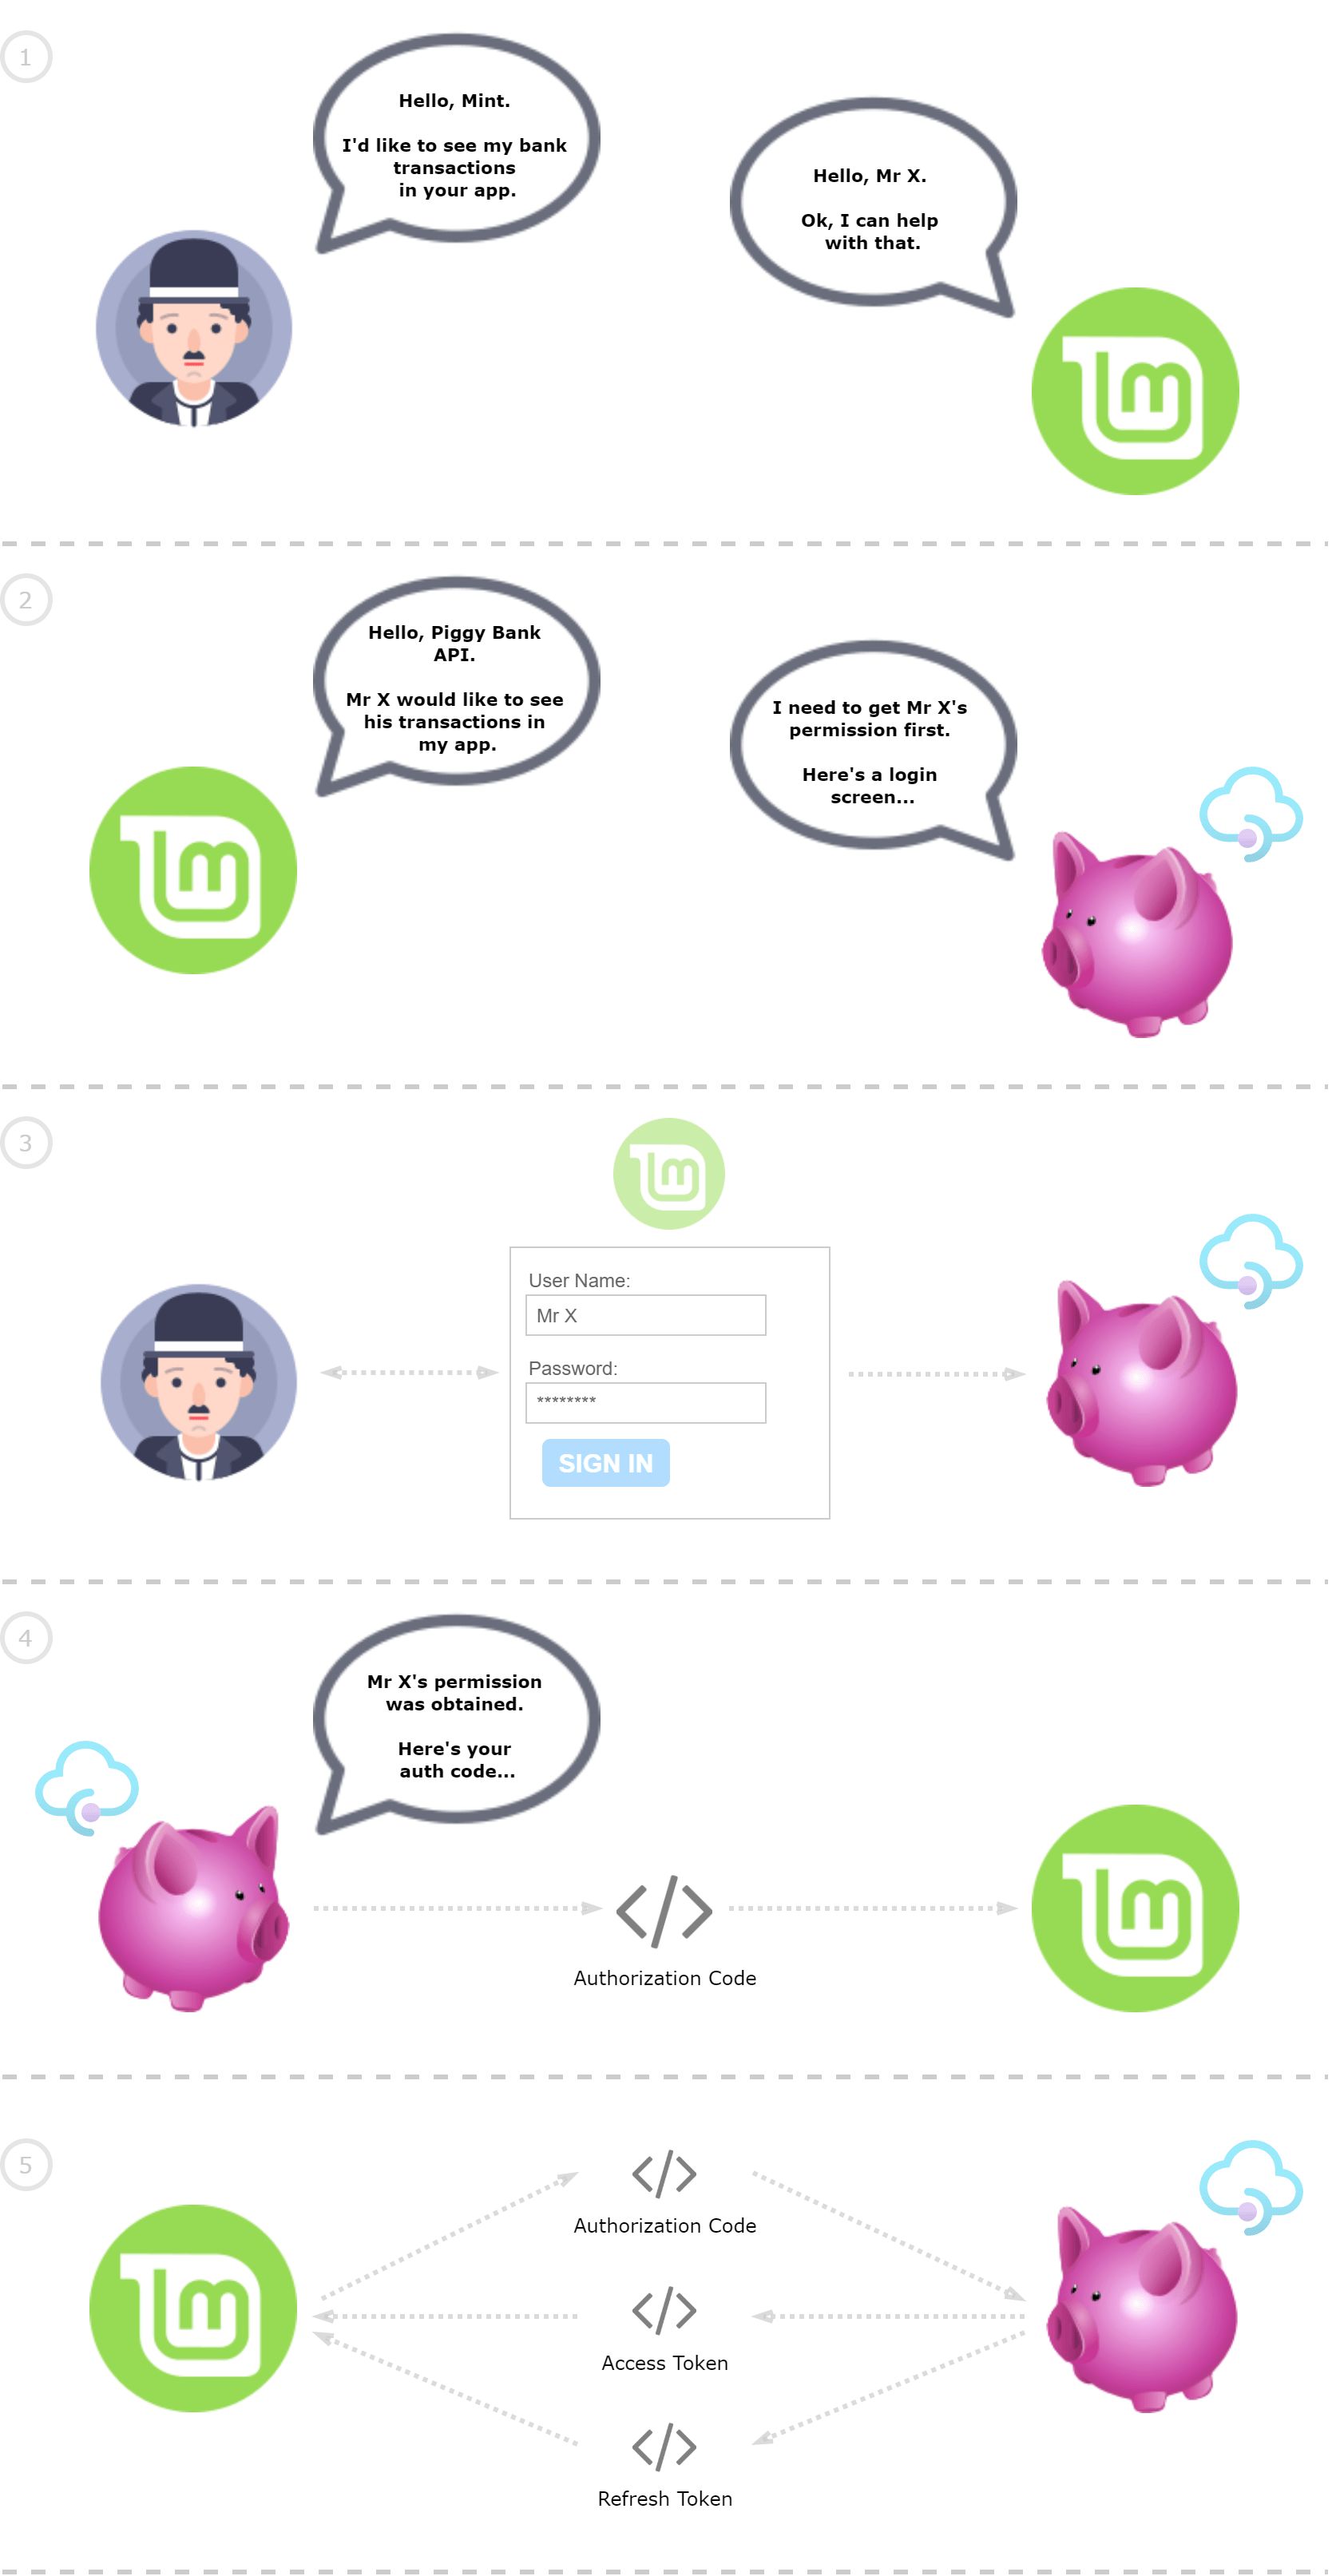
Let’s say for example that I am using Mint, an online tool that helps me manage my money and budgets. I’d like to see all of my bank transactions in the Mint interface, and therefore need to give Mint the necessary permission to do so. The bank has an OAuth 2.0 API that allows Mint to get access to your account, and in order to make it happen the following would be a likely exchange:
The steps
- The user (Mr X) asks Mint to get all their bank transactions.
- Mint sends a request to the bank’s OAuth 2.0 API, on behalf of the user. The bank’s API doesn’t trust Mint and sends back a login screen, in order for the user to authenticate themselves and provide the necessary permissions (scope).
- The user logs into their bank account and consents to what Mint will extract on their behalf.
- Once the user is successfully authenticated by the bank, the bank’s API sends back an authorization code.
- Mint exchanges the authorization code for an access and refresh token, which it will use in the future to extract data on behalf of the user.
The steps I’ve listed here are somewhat simplified, and OAuth APIs can be implemented in a slightly different way depending on the vendor. It’s important to read the API vendor’s documentation to see exactly what the authorization flow looks like, and that’s part of the challenge to get things to work.
The manual part
Step number two should have raised the alarm in your mind, and rightly so as this step requires user interaction. ETL tools are built to be automated and run without user interaction, and is unable to display the vendor’s login screen during execution.
To overcome this juxtaposition you should always run through the authorization flow manually and outside your ETL framework first, to get the access and refresh tokens. I like to use Postman to run through the initial authorization flow, get the necessary tokens and test the execution of the API requests. Postman makes it really easy to do that, and I recommend getting familiar with it and adding it to your proverbial “bag of tricks”.
In the next post, we’ll take a closer look at Postman and how to run through this part manually in order to get the necessary tokens.
I loved the diagram explanation! I have been reading about oauth for a while, and this has been the clearer example!